Table of contents
- Introduction
- Initial Inspection and Preparation
- Step 1. Charge the RV Batteries
- Step 2. Clean the RV Exterior
- Step 3. Flush the Water System
- Step 4. Water Line Sanitization
- Step 5. Check the RV Tires
- Step 6. Inspect the Propane System
- Step 7. Check Engine and Generator
- Step 8. Check Your RV’s Safety Devices
- Step 9. Clean the RV Awning
- Conclusion
- Plan Your Next Adventure at Black Hawk Creek RV Park
- Related Articles
As winter fades and camping season approaches, it’s time to prepare your recreational vehicle for adventures ahead. Learning how to properly de-winterize your camper is essential for preventing damage and ensuring all systems function correctly. De-winterizing an RV involves several critical steps, from removing antifreeze from the water system to checking appliances and inspecting for winter damage. This comprehensive guide will walk you through the entire process of de-winterizing your RV, helping you prepare for a trouble-free camping season.
Introduction
When spring arrives, the excitement of upcoming camping trips begins to build. However, before hitting the road, it’s crucial to properly de-winterize your camper to ensure everything functions correctly after months of storage. Improper de-winterization can lead to damaged plumbing, appliance malfunctions, and other issues that could potentially ruin your camping experience. The de-winterize camper process involves several important steps: removing antifreeze from the water system, checking for winter damage, testing all systems, and ensuring everything is clean and ready for use.
This guide provides a comprehensive, step-by-step approach to de-winterizing your RV/camper, covering everything from initial inspection to final road-readiness checks. By following these instructions, you’ll ensure your camper is safe, functional, and ready for the adventures that lie ahead. Whether you’re a seasoned RVer or preparing your camper for the first time after winter storage, this guide will help you navigate the de-winterization process with confidence.
Initial Inspection and Preparation
Exterior Inspection
Before diving into the de-winterization process, conduct a thorough exterior inspection of your camper. Winter conditions can be harsh on RVs, causing various types of damage that should be addressed before your first trip.
Start by examining the roof, which is particularly vulnerable to winter damage. Look for:
- Cracks or tears in the roof membrane
- Damaged or loose sealant around vents, antennas, and air conditioners
- Signs of water damage or staining
- Debris that may have accumulated during storage
Next, inspect all exterior seals and seams, including those around windows, doors, and storage compartments. Winter temperature fluctuations can cause sealants to crack or separate, potentially leading to water intrusion. Pay special attention to corner moldings and areas where different materials meet, as these are common leak points.
Check all exterior lights, including brake lights, turn signals, and marker lights. Replace any bulbs that aren’t working and ensure all lenses are intact. Inspect awnings for proper operation and any signs of mold or mildew that may have developed during storage.
Look for signs of pest intrusion, such as nests, droppings, or chewed materials. Rodents and insects often seek shelter in stored campers during winter months and can cause significant damage to wiring, insulation, and other components.
Minor issues like small sealant cracks can typically be repaired by owners using appropriate RV sealants. However, more significant problems like roof damage or extensive water intrusion may require professional attention before you hit the road for your camping trip.
Interior Inspection
After completing the exterior inspection, move inside your camper to assess the interior condition. Open all windows and vents to air out the space, eliminating stale air and any lingering antifreeze odors from the de-winterizing camper process.
Thoroughly check for signs of water damage, which might appear as stains on the ceiling or walls, soft spots on floors, or warped cabinetry. Pay special attention to areas around windows, roof vents, and plumbing fixtures, as these are common leak points.
Inspect all cabinets, drawers, and storage compartments for signs of moisture, mold, or pest activity. Remove any mouse traps or mothballs that were placed during winterization. Check upholstery, mattresses, and curtains for mold or mildew, which can develop in the humid conditions of a closed-up camper.
Test all interior lights, fans, and electrical outlets to ensure they’re functioning properly. Check smoke detectors, carbon monoxide detectors, and LP gas detectors, replacing batteries as needed to ensure these critical safety devices are operational.
Look for any unusual odors that might indicate problems with the plumbing, propane system, or electrical components. Musty smells could indicate mold growth, while a rotten egg smell might signal a propane leak that requires immediate attention.
If you find minor issues like small water stains or slight mildew, these can typically be addressed with appropriate cleaning products. However, extensive water damage, electrical problems, or structural issues may require professional assessment before proceeding with the rest of the de-winterization process.
Step 1. Charge the RV Batteries
The first and crucial step in de-winterizing your RV/camper is to charge the batteries. After a long period of inactivity, your batteries may have lost their charge. Here’s how you can get them back in action:
- Check Battery Condition: Inspect the batteries for any visible damage or leaks. If you notice any issues, consult a professional.
- Clean Battery Terminals: Remove any corrosion or dirt from the battery terminals using a battery brush or a mixture of baking soda and water.
- Reconnect and Charge: Reconnect the batteries and plug your RV into shore power. Allow the batteries to charge fully to ensure they’re ready for your upcoming adventures.
Step 2. Clean the RV Exterior
Before hitting the road, you’ll want to make sure your RV/camper is sparkling clean and in good condition. This includes the following tasks:
- Clean Solar Panels: If your RV has solar panels, clean them to maximize energy absorption.
- Check the Roof: Inspect the roof for cracks and leaks. Any damage should be repaired promptly.
- Test Doors and Windows: Ensure that all doors and windows open and close properly. Lubricate hinges and locks if needed.
- Inspect Plumbing and Electrical Lines: Examine all plumbing, electrical, and water lines for any signs of damage or wear. Replace any compromised components.
- Exterior Wash: Give your RV a thorough exterior wash to remove any dirt or grime accumulated during the winter months.
- Roof Inspection (Again): Don’t forget to recheck the roof for cracks and leaks after cleaning and repairs.
Step 3. Flush the Water System
De-winterizing your water system is a critical step to preparing your RV/camper for spring adventures. Follow these steps to flush the water system:
- Drain Antifreeze: Ensure that all antifreeze is completely drained from your plumbing system. Run each faucet until only freshwater flows.
- Replace Filters: If your RV has water filters, replace them to ensure clean and safe water.
- Check Water Heater: Check the water heater and bypass valve to ensure they are in the correct position for normal use.
- Flush the Lines: Run water through all faucets, both hot and cold, until any remaining antifreeze is fully flushed out.
Step 4. Water Line Sanitization
Sanitizing the water system is essential for maintaining water quality. Here’s how to do it:
- Prepare a Solution: Mix one-quarter cup of bleach with one gallon of water for every 15 gallons of water your freshwater tank can hold.
- Fill the Tank: Pour the bleach solution into your freshwater tank and then fill it completely with water.
- Run the Water: Turn on each faucet, one by one, until you can smell the bleach solution. Then turn them off.
- Wait and Drain: Let the solution sit in the lines and tank for at least four hours. Afterward, drain the tank and flush the system until the smell of bleach is gone.
Step 5. Check the RV Tires
Inspecting your RV tires is a crucial safety measure. Here’s how to ensure your tires are ready for the journey:
- Tire Pressure: Check and adjust the tire pressure according to the manufacturer’s recommendations. Proper tire pressure ensures even wear and better fuel efficiency.
- Tire Tread: Inspect the tire tread for any signs of excessive wear or damage. Replace tires if necessary.
- Spare Tire: Ensure your spare tire is in good condition and properly inflated.
Step 6. Inspect the Propane System
Your propane system is essential for cooking, heating, and running appliances in your RV. Here’s how to ensure it’s in working order:
- Check for Damage: Examine the propane system for any visible damage or signs of wear. Pay particular attention to hoses and connections.
- Rodent Damage: Look for chewed wires or any areas where snow or water may have entered, potentially causing damage.
- Test for Leaks: Use a propane leak detector or soapy water to check for any gas leaks at connections. If you detect a leak, shut off the propane and consult a professional.
Step 7. Check Engine and Generator
To ensure your RV is mechanically sound, it’s essential to inspect the engine and generator. Here’s what to do:
- Fluid Levels: Check the fluid levels of the power steering, transmission, engine oil, brake fluid, engine coolant, and windshield washer fluid. Top off or replace any fluids as needed.
- Battery Check: Inspect the engine and generator batteries to ensure they’re fully charged and in good condition.
- Oil and Filters: Change the oil and filters in both the engine and generator according to the manufacturer’s recommendations.
- Run the Generator: Start and run the generator for at least 30 minutes to ensure it’s working properly.
Step 8. Check Your RV’s Safety Devices
Safety should be a top priority when de-winterizing your RV/camper. Here’s what to check:
- Smoke Alarm: Test the smoke alarm and replace the batteries if necessary.
- Fire Extinguisher: Ensure the fire extinguisher is fully charged and in good working order.
- Carbon Monoxide Detector: Test the carbon monoxide detector and replace its batteries if needed.
- LP Detector: Check the LP (propane) detector to ensure it’s functioning correctly.
Step 9. Clean the RV Awning
Your RV’s awning is not only functional but also adds to the overall aesthetic. Follow these steps to clean it:
- Brush Off Debris: Carefully remove any dirt, leaves, or debris from the awning fabric.
- Cleaning Solution: Mix a solution of mild soap and water.
- Scrub and Rinse: Using a soft brush or sponge, scrub the awning with the cleaning solution. Rinse thoroughly with water.
- Allow to Dry: Extend the awning fully and let it dry completely before retracting it.
Conclusion
Successfully de-winterizing your camper is a comprehensive process that requires attention to detail and methodical work. By following the steps outlined in this guide, you’ve ensured that all systems in your RV are functioning properly and ready for the camping season ahead. From flushing antifreeze from the water system to checking appliances and preparing for road travel, each step in the de-winterize camper process plays a vital role in protecting your investment and ensuring trouble-free camping experiences.
Remember that proper de-winterization is not just about convenience—it’s about safety and protecting your valuable recreational vehicle. Taking the time to thoroughly inspect, clean, and prepare your camper after winter storage helps prevent costly repairs and extends the life of your RV’s components and systems.
Consider creating a personalized de-winterization checklist based on your specific camper model and equipment. This will help streamline the process in future years and ensure no important steps are overlooked. Your checklist can be refined each season based on your experiences and the specific needs of your RV.
With your camper properly de-winterized and ready for adventure, you can look forward to a season of memorable camping experiences, beautiful destinations, and the freedom of the open road. Whether you’re planning weekend getaways or extended journeys, your well-prepared RV will provide a comfortable and reliable home away from home.
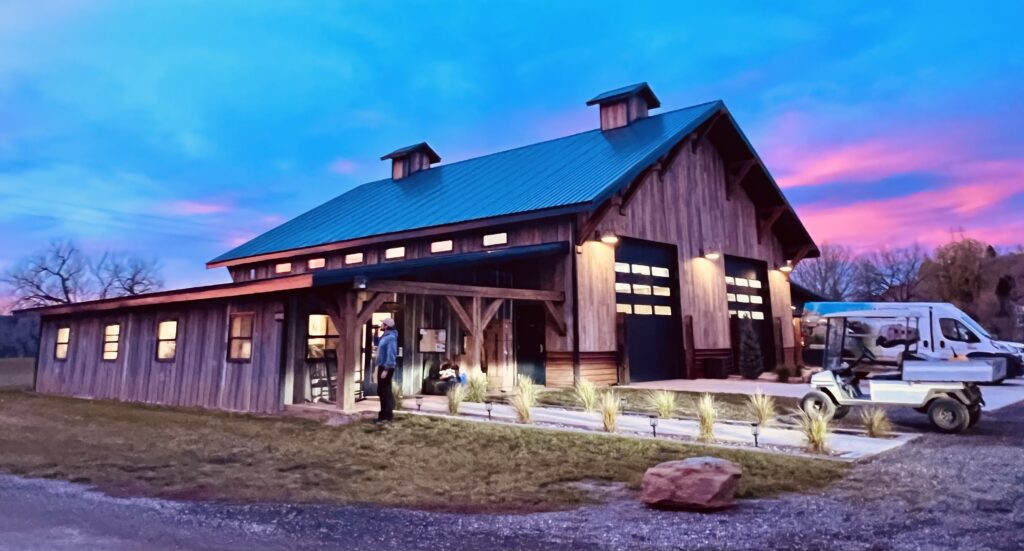
Plan Your Next Adventure at Black Hawk Creek RV Park
After successfully de-winterizing your camper, it’s time to plan your first adventure of the season! Located just 2 miles from the interstate and only 5 minutes from vibrant Rapid City, Black Hawk Creek RV Park & Cabins offers the perfect base for exploring South Dakota’s iconic attractions. With spacious RV sites and cozy cabins available year-round, we welcome both short-term travelers and those seeking extended stays.
From our convenient location, you’re just a scenic drive away from Mount Rushmore, Crazy Horse, Custer State Park, Badlands National Park, Devils Tower, and historic Deadwood. Our facilities cater to all your camping needs, and for those traveling with horses, our adjacent Black Hawk Stables provides convenient boarding options.
Book your stay at Black Hawk Creek RV Park today and make this camping season your most memorable yet! Visit our website or call us to reserve your perfect spot in the heart of South Dakota’s beautiful Black Hills region.