Table of contents
When towing a trailer, a weight distribution hitch setup is essential for ensuring a smooth, secure, and safe ride. It plays a crucial role in maintaining the balance between the tow vehicle and the trailer, improving vehicle handling, reducing sway, and enhancing overall towing safety. If you’re unsure about how to adjust weight distribution hitch components or how to install and how to set up weight distribution hitch correctly, don’t worry! This guide will walk you through the process on how to install weight distribution hitch. By following these instructions, you can achieve a proper weight distribution hitch adjustment, which will make your towing experience safer and more comfortable.
Understanding Weight Distribution Hitches
A weight distribution hitch (WDH) is a crucial towing component that helps balance the weight of a trailer across the axles of both the trailer and tow vehicle. It’s designed to distribute the load more evenly, which reduces the strain on the tow vehicle’s rear axle and the trailer’s tongue weight. By ensuring a more level towing setup, it improves the overall handling, braking, and stability of the vehicle-trailer combination.
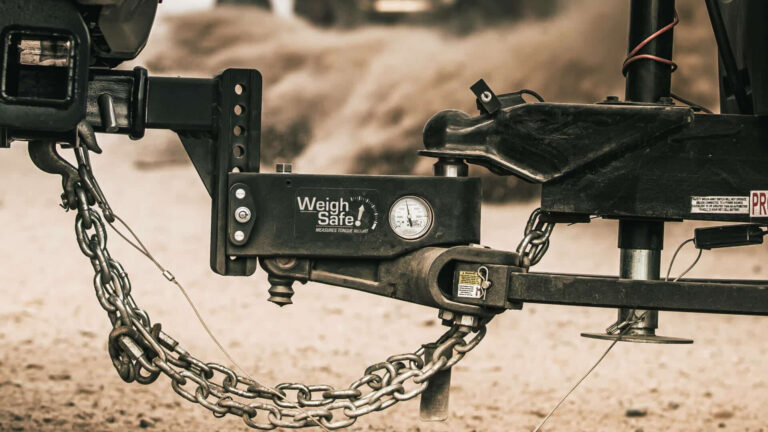
The key components of a weight distribution hitch include the hitch head, spring bars, and chain brackets. The hitch head is mounted onto the receiver tube of the tow vehicle, while the spring bars distribute the trailer’s weight to the vehicle’s front axle. Chain brackets ensure that the spring bars are securely positioned for proper weight distribution.
Using a weight distribution hitch not only improves towing control but also helps in reducing sway, providing better steering control, and minimizing wear and tear on both the tow vehicle and the trailer. A well-adjusted weight distribution hitch is essential for the safety of your towing setup.
Step-by-Step Weight Distribution Hitch Setup
Step 1: Level the Trailer
The first step in setting up your weight distribution hitch is ensuring that the trailer is level. This is crucial because accurate measurements rely on a level setup to properly adjust the hitch and achieve optimal weight distribution.
Start by using the trailer tongue jack to raise or lower the trailer until it is parallel to the ground. Check the level with a trailer level or a standard bubble level to confirm that the trailer is completely level. This ensures that the hitch setup and all measurements are precise and consistent throughout the process.
Step 2: Measure Vehicle and Trailer Heights
Once the trailer is level, the next step is to measure the height of both the trailer and the tow vehicle. To do this, measure the distance from the ground to the top of the trailer’s coupler, as well as the heights of the front and rear bumpers of the tow vehicle. These measurements are important because they help determine the correct hitch head height.
To achieve the right weight distribution hitch adjustment, these measurements will allow you to adjust the hitch head height properly, which is essential for achieving a level tow vehicle and trailer combination. Make a note of these measurements for the next steps.
Step 3: Mount the Hitch Head
Now that you have the necessary measurements, it’s time to install the hitch head. Insert the weight distribution shank into the receiver tube of your tow vehicle. Ensure that the shank is properly aligned and securely fastened.
Next, position the hitch head assembly at the correct height, which should be 1-3 inches above the height of the trailer coupler. Use the measurements you recorded earlier to determine this. Attach the hitch head to the shank using one bolt, ensuring that it is tightly secured.
Step 4: Adjust the Hitch Head Angle
In this step, you’ll adjust the angle of the hitch head to ensure proper weight distribution. The goal is to have the hitch head at the right angle so that the spring bars are working to distribute the load evenly.
To adjust the hitch head angle, use washers on the adjustment rod. These washers will help raise or lower the hitch head to achieve the desired angle. The number of washers you need will depend on your setup and the load being carried. More washers may be necessary for a higher angle, while fewer washers will lower the angle. Adjust the hitch head until the spring bars sit in the correct position for optimal weight distribution.
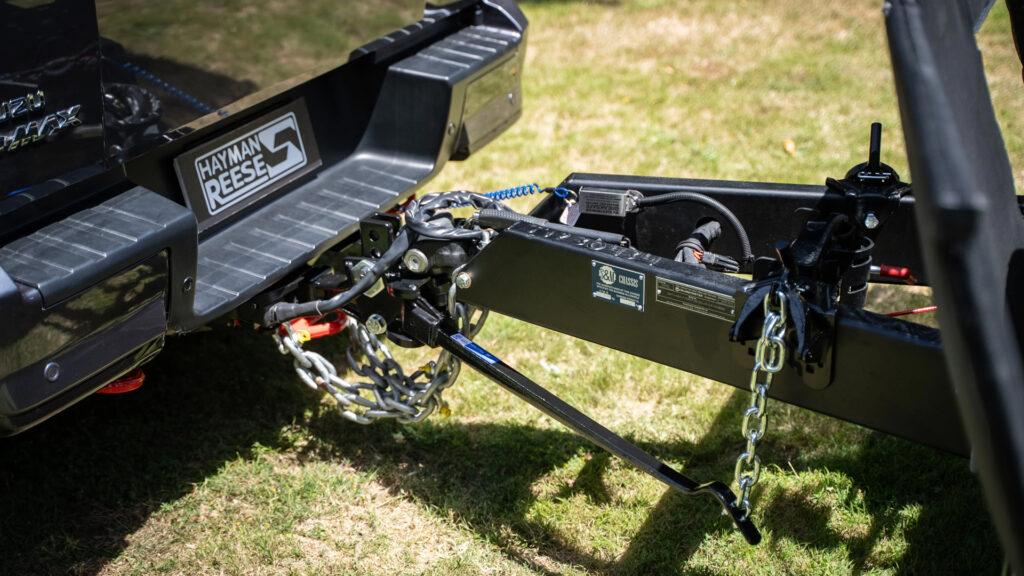
Step 5: Install the Spring Bars
Next, attach the spring bars to the hitch head. Start by securing the spring bar chains to the spring bars and mounting them on the hitch head. Ensure both spring bars are installed securely and are aligned correctly. The spring bars should be able to distribute the trailer’s tongue weight to the tow vehicle’s front axle evenly.
The placement of the spring bars is important for achieving the correct weight distribution. Double-check that they are secured properly to prevent any issues during towing.
Step 6: Couple the Trailer
Now, it’s time to couple the trailer to your tow vehicle. Begin by raising the trailer coupler using the trailer jack, and then latch the coupler to the tow vehicle’s hitch ball.
After the coupler is secured, lower the trailer jack until it is just high enough to make the coupler sit on the hitch ball. This step is necessary for coupling the trailer properly before proceeding with the weight distribution hitch adjustment.
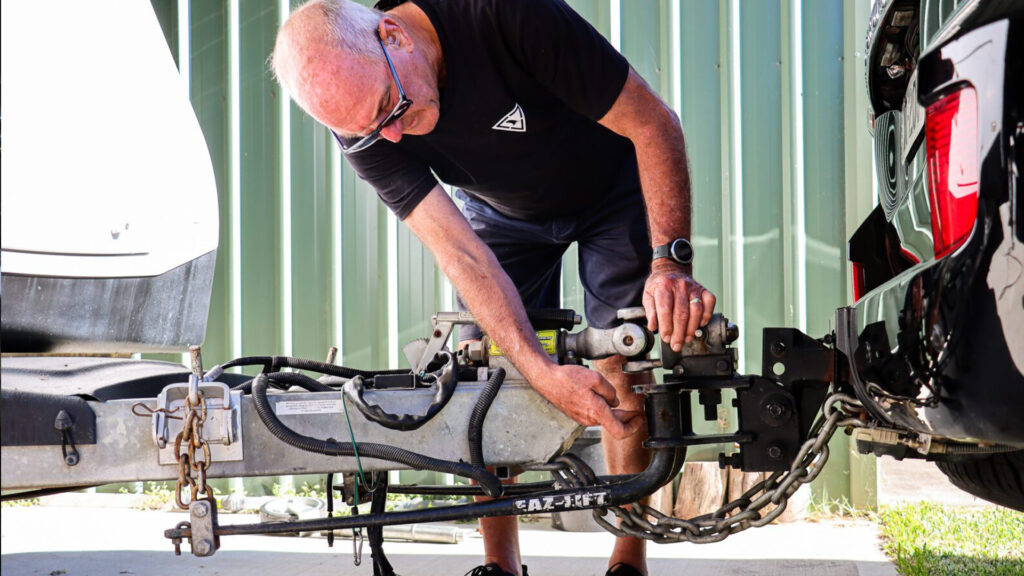
Step 7: Mount the Spring Bar Hookup Brackets
Now that the trailer is coupled, it’s time to install the spring bar hookup brackets. Position the brackets on the trailer frame, making sure they are spaced equally on both sides of the trailer. Use the spring bar chains as a guide for proper placement.
Once the brackets are in place, use the lift handle to lock the brackets onto the frame. This step ensures that the spring bars are securely connected and ready to distribute the weight evenly.
Step 8: Make Final Adjustments
The final step involves making any necessary adjustments to ensure the weight distribution hitch is properly set up. Begin by retracting the trailer jack and re-measuring the height of the tow vehicle’s front and rear bumpers.
Check if the vehicle is level and whether the trailer is properly aligned. If adjustments are needed, you may need to change the spring bar chain links or further adjust the hitch head angle. Make sure the vehicle and trailer are level and that the weight is distributed evenly for a safe and stable towing experience.
Tips for Proper Use and Maintenance
Once your weight distribution hitch setup is complete, it’s essential to maintain it regularly to ensure it continues to function properly. Here are some helpful tips:
- Regular Inspections: Check your weight distribution hitch periodically for signs of wear or damage. Inspect the spring bars, chains, and hitch components for any cracks or loose parts.
- Lubrication: Apply grease to the hitch ball and other moving parts of the hitch to reduce friction and ensure smooth operation.
- Adjustments: Be prepared to adjust the weight distribution hitch adjustment settings if you change the load or if you notice any changes in your towing experience.
- Professional Help: If you’re unsure about how to install weight distribution hitch components or if the setup doesn’t seem right, don’t hesitate to seek professional assistance.
By keeping these maintenance tips in mind, you can ensure your weight distribution hitch setup stays in optimal condition, providing you with a smooth and safe towing experience for years to come.
A well-adjusted weight distribution hitch setup ensures that your towing experience is safe, comfortable, and efficient. By following these steps and regularly maintaining your hitch, you can achieve a secure towing setup every time. Whether you’re new to towing or a seasoned pro, knowing how to set up weight distribution hitch components correctly can make a significant difference in the performance and safety of your RV or trailer.
Perfect Your Towing Experience at Black Hawk Creek RV Park & Cabins
Ready to fine-tune your weight distribution hitch setup? There’s no better place to perfect your towing skills than Black Hawk Creek RV Park & Cabins. Nestled near iconic attractions like Mount Rushmore and Badlands National Park, our spacious sites and supportive community make it the ideal environment for RVers seeking practical tips and hands-on experience. Whether you’re fine-tuning your setup for the first time or looking to refine your technique, our park offers the perfect base camp. Book your stay today and enjoy a safe, balanced towing experience amid the beauty of South Dakota’s landscapes. Let the adventure—and your hitch setup—begin!